Help Contents | VPC Sign On | Welcome Page | Tree View | Open/Save Screen | Check-out | Check-in | History | Copy to Local | Add | Search (document) | Search (attributes) | Search (document attributes) | Entering and Editing Data in a Table | Workplan | Calendar | Pending Action Items/Tasks | Notification | Action Items | Email Table | User Broadcast | User File Merge | User Document Merge | Attributes (proposal) | Attributes (general) | Team Members | User Profile | Dashboard
Administrator Log On | Set Up | Copy to Local | Permissions | Groups | Admin. Workplan | Admin. Notification | Admin. Calendar | Admin. Action Items | Admin. Email Table | Admin.Search (document) | Admin. Search (attributes) | Admin. Search (document attributes) | Admin. History | File Merge | Document Merge | Admin. Attributes (proposal) | Admin. Attributes (general) | Admin. Attributes (document) | Banner Message | Broadcast Message | Users | Zone | Glossary (Definitions)
Admin. Email Table
Messages with file attachments, if desired, can be sent from VPC users to each other with a record kept of what
was sent, who sent it to whom and when. The E-Mail table shows all previously sent emails. Click on any email and the text
of the message will show in the text box. Use Ctrl C to copy text from the message box to another table or application.
Delete Email messages by highlighting the email(s) and clicking on the Delete Selected Rows icon. Click on the Print icon
to print the contents of the email table.
|
See Compose Email

Back to top
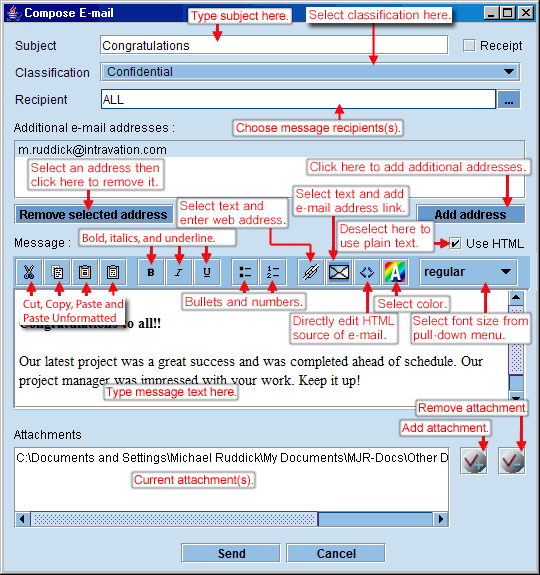
Compose E-Mail